

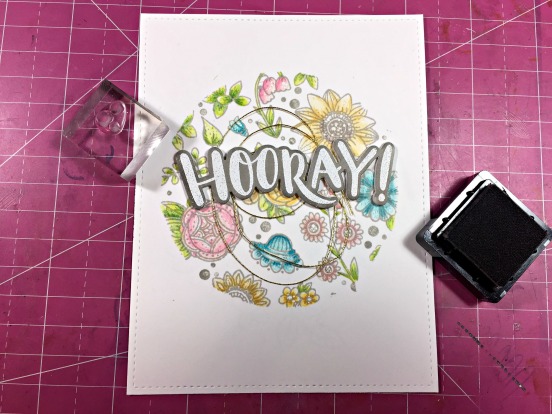
Good morning everyone! Welcome to the Misti & Honey Bee Stamps Collaboration Blog Hop! There are so many fun projects to see today using both brands. I’ve had a Mini Misti Stamping Tool for a little while, and I love it! It’s great for techniques and mass producing cards. However, it’s also great for making sure the things you stamp are crisp and well stamped. For today’s card there are a couple of reasons that having a Misti was such a lifesaver. Here’s a look at the card I made.
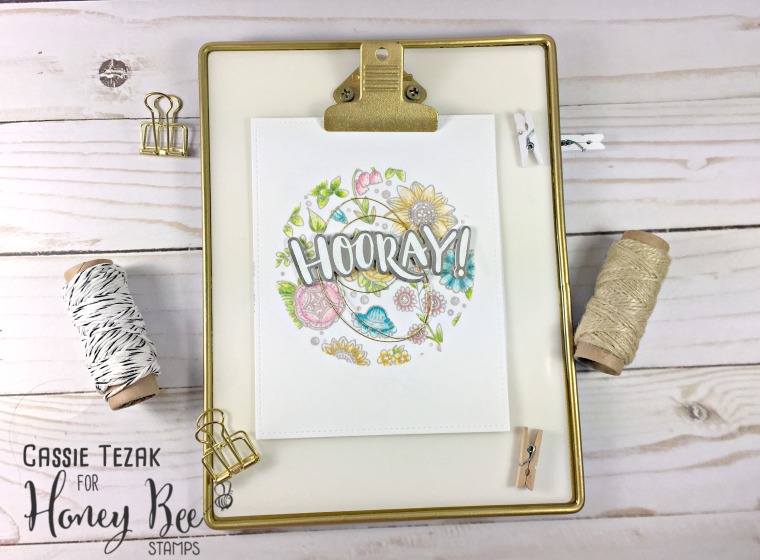
This card was made so easy by simply utilizing my Misti as well as the adorable products from Honey Bee to create a spring-y look.
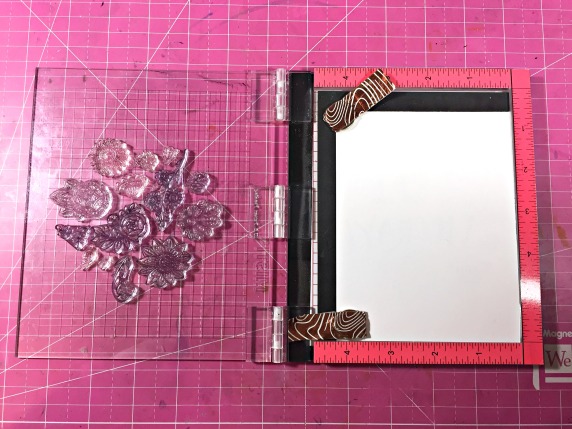
I started by arranging the flowers from the Zen Floral set on the clear door of the Misti Stamping Tool. I made sure to arrange them as close as possible and tried to center them on the card, although I did some masking so it didn’t matter too much that they were centered.
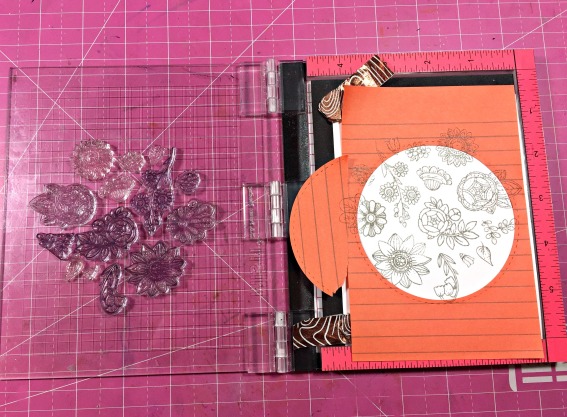
I die cut a circle out of a larger post it note and put it over my card panel. You always want to make sure that the piece of paper you put in the Misti is completely in the corner and secured with the magnets if possible. This ensures that your stamping is always in the same place. I stamped in some gray ink, and because there were so many images to stamp, the crispness of the flowers was not the best. This is why it’s so important to make sure everything is lined up-so that when you need to re-stamp it does so in the right place. I did have a couple empty places that I filled in with some leaves on a separate block.


Next I used my Prisma Colored Pencils to color in the flowers. I tried to stick to bright colors. I used 2 shades per colored image to get more depth. I’m not the best at colored pencils, but it was fun to pull them out again! It makes me want to practice with them more.


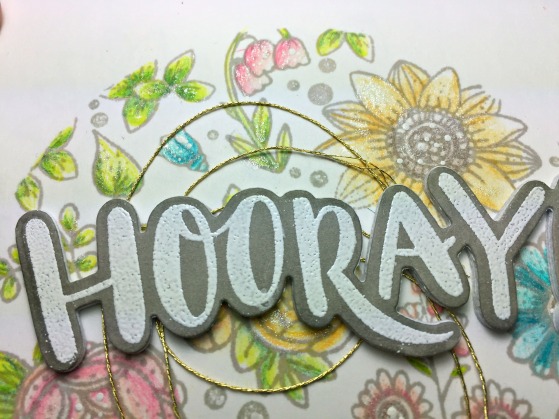
Next I die cut the Hooray outline die. I didn’t have any gray card stock to match the gray ink so I colored the die cut with a Copic marker that matched. Then I stuck it in the Misti. There is a stamp that fits perfectly within the shadow of the Hooray sentiment. This was a bit tricky to make the die stay in place in the Misit, as I couldn’t use the magnets to keep it in place, but with some patience it worked so well! I stamped it with VersaMark ink and used white embossing powder on it. I love the way it turned out!
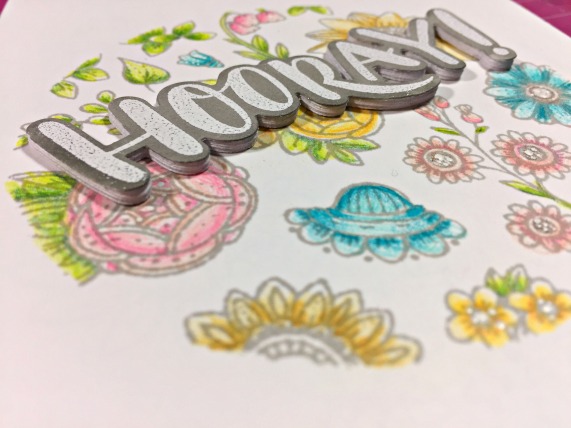
I die cut about 4-5 more of the shadows and glued them all together for some dimension. I wanted the sentiment to really stick out.
I felt like there were some empty spaces that were bothering me, so I grabbed the Celebration Box set and used one of the confetti clusters to fill them in. I did this after I had already glued down my die cut sentiment and gold string-which made it more difficult. It worked though!
The finishing touch was to add some shimmer and gel dots to the flowers. You can kind of see it here in this close up shot. It’s hard to see it in the other photos though. In real life it’s so pretty.
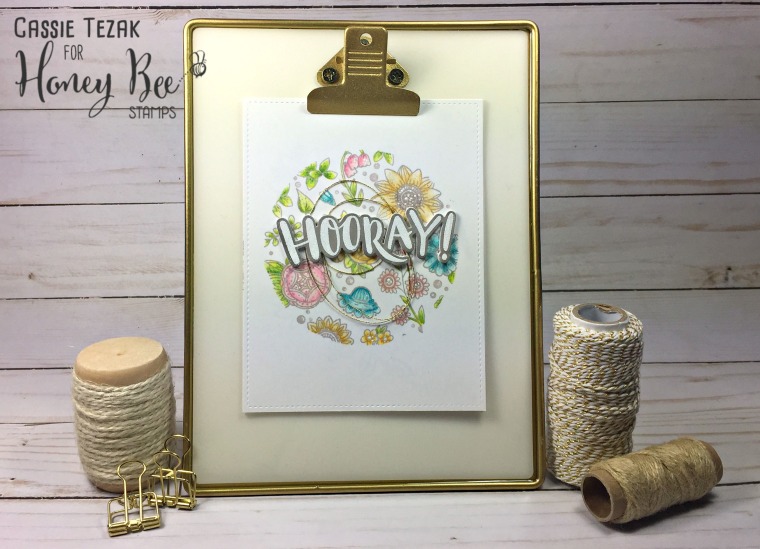
And that’s it for the card I made for today! I hope you enjoyed the tutorial! Below is the hop list for everyone participating.
Be sure to leave a comment on each of the blog posts for a chance to win a prize! The winner of the Misti giveaway will be announced on their page on April 7th! Thanks so much for stopping by:) Have a great day!


I just CASEd your thanks card. I hope you know I think it’s great!
LikeLiked by 1 person
Awesome card! Love the reverse masking and coloring! Beautiful flowers and great use of your MISTI!
LikeLike
I love the way you masked the circle and put the flowers around it.
LikeLike
Beautiful card! I love the floral circle as a ground for the sentiment.
LikeLike
Hooray! I have the Zen Florals set and pencils. I will be CASEing this card. It is wonderful!
LikeLike
Love this card. It’s colorful and interesting. Thanks for the tip on the circle mask. Very, very cool idea.
LikeLike
You got a lot of impact in this card and I love the way you set off the sentiment.
LikeLike
I love, love, love this card. The colors are beautiful. Thanks for sharing.
LikeLike
Really pretty floral card..love the masking and ease of the Misti.
LikeLike
This card is so pretty!! You added the perfect amount of dimension to that bold sentiment to help it stand out from your pretty floral background. And yes what a different it makes having the MISTI, you can stamp all those florals at once! Thanks so much for sharing.
LikeLike
WOW, beautiful technique
LikeLike
What beauty in your card. Wonderful creative use of your tools.
LikeLike
This has really given me inspiration-thank you! Wonderful work!
LikeLike
Beautiful! I love the circle masking!
LikeLike
Love how you made this card – the masking and the use of misti is very inspiring:)
LikeLike
Cool. Thanks
LikeLike
So very cute!
LikeLike
I love the stamps. I want them all!! You make beautiful cards with a lot of heart. Thank you!
LikeLike
I just love this project! Thank you so much for the inspiration!
-Miranda
LikeLike
Wow so many ways to go with such a good but simple design!!! Great job!
LikeLike
Gorgeous project. Love the pretty flower background.
LikeLike
Awesome card. Thank you for sharing your ideas and techniques.
LikeLike
Masking off the circle… what a great idea to extend the stamp! This is LOVELY!!
LikeLike
Lovely card. The simplicity of it is beautiful.
LikeLike
Beautiful card.
Love the soft colors.
thanks for sharing.
LikeLike
Wow! Superb!!! Great project!
LikeLike
Wonderfully simple and so pretty – I really like the circle effect.
LikeLike
So love the way you did this into a circle!!!!!!
LikeLike
I think I have pinned nearly every stop! Fabulous!
LikeLike
LOVE the flower circle you created!!
LikeLike
Beautiful card!
LikeLike
Like seeing the small stamps grouped together
LikeLike
This is such a pretty card. Thanks for sharing.
LikeLike
I love how you created your card.
LikeLike
Oh wow!!! Gorgeous card!!!
LikeLike
A very lovely card.
LikeLike
Thanks for showing me how you mask the circle. Pretty card–great supplies.
LikeLike
Beautiful card! Love the masking, coloring as well as the thread to decorate for the final look. Thank you for sharing!
LikeLike
What a beautiful card. Great stamping technique. Thanks for sharing it.
LikeLike
Cute card and thank goodness for the MISTI! Thanks for sharing!
LikeLike