Your Next Stamp Challenge

Good morning, crafty friends and welcome back! Today I’m participating in the Your Next Stamp challenge #89. Today I got inspired by the sketch challenge. It’s a fun one and I knew I had to run with it. Here’s a look at it.

To create my card for today I mixed some old and new products to create a bright and fun card that I think anyone would love to get in the mail! Here’s a look at my creation!

IMG_1715

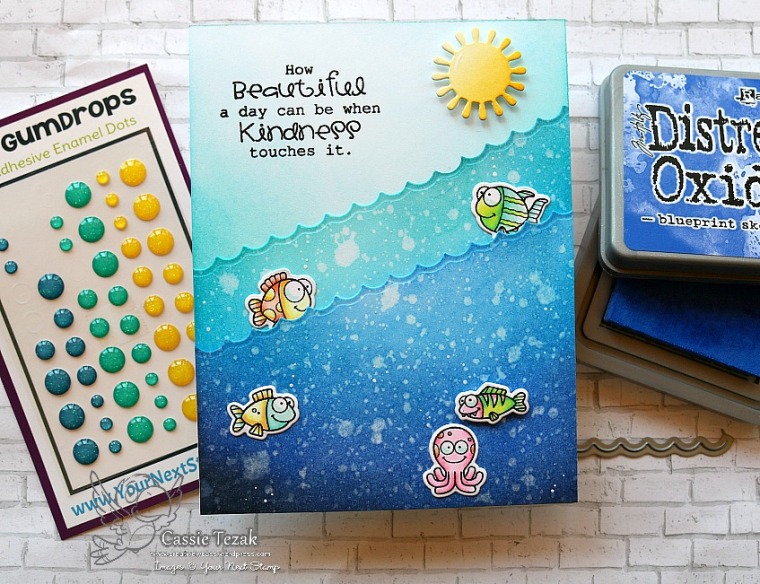
I started by die cutting two pieces of card stock diagonally with the smaller wave from the Little Waves Die Set. The die wasn’t long enough to fit all the way across so I had to run it through twice, being sure to line it up so that the wave continued straight. Once they were cut I used Distress Inks to ink blend over them. The bottom piece has Chipped Sapphire, Blueprint Sketch, and Mermaid Lagoon. The second piece has Mermaid Lagoon and Peacock Feathers, and the card base, which is the sky, has a little bit of Peacock feathers and Tumbled Glass. Each piece of the water panels were spritzed with water and once they were dry I adhered them to the card base.

IMG_1713

Next I stamped out a handful of the sea creatures from Aquarium Antics and colored them in with bright colors. I die cut them out with their coordinating dies and they were added to the card base. Only one little fish was popped up with foam, and the rest were adhered straight down to the card.

IMG_1711

Next I stamped the sentiment from Heartfelt Sentiments in the top left corner, because it had the most room. I wanted to add one more pop of color, so I die cut the sun from the new Beach Day Die set and ink blended some Fossilized Amber Distress Ink over top. That was popped up with foam tape.

IMG_1710

And that’s it for my card today! I hope you enjoyed it 🙂 Thanks so much for stopping by and be sure to head over to the your next stamp blog to play along with us, see the other creations by the team and find out how you can win a gift certificate!

I hope you all have a great weekend, and I’ll see you again soon with another card!

Rain Or Shine

Hello again! And welcome back! Today I’m here to share a card with you all for the newest Your Next Stamp challenge. The latest challenge had a really fun color combo that I knew I wanted to give a try.

Isn’t it so pretty?! To make the card for today I grabbed some of my blue Distress Inks and ink blended over a 4 1/4 square piece of paper. Then I die cut the Rain Drop Die from it. On my card base, I ink blended a lighter blue for the rain drops.

IMG_1498

Next I stamped three cute chicks from the Puddles of Fun stamp set and colored them in with my Copics. Then I die cut them with the coordinating dies and adhered them to the die cut piece.

IMG_1501

I stamped the sentiment in VersaMark ink and heat embossed gold embossing powder over it. I trimmed the piece down and added it to the panel with foam tape.

IMG_1499

Be sure to head over to the Your Next Stamp blog to see all of the design team projects and join in the challenge with us!

Thanks so much for stopping by! I hope you enjoyed the card for today. I hope you have a great Friday!


Your Next Stamp Blog Hop!

Hi everyone! And welcome back for the Your Next Stamp blog hop! If you’re just joining the hop, make sure you don’t miss anything and head back to the start on the YNS blog. Leave comments along the way to enter yourself for a chance to win a $25 gift certificate to the shop! Easy as that!

There are so many great products coming out this month at Your Next Stamp and one of my absolute favorites in the newest addition to the All Aboard collection. All Aboard has a cute train and carts and there have been so many add ons to this set. The new All Aboard Welcome Baby set does not disappoint! It’s got so many cute little images to make adorable scenes for your loved ones who are expecting.

Isn’t it adorable?? Here’s the card I made using this set. I decided I didn’t want to go with the typical soft colors that are normally used with baby cards, so I pulled out my Distress Oxides for a brighter pop of color and some masking.

026.jpg

You could make a long card with tons of carts full of baby stuff, or go with a A2 size like I did and shorted the train up a bit!

Another amazing stamp set coming with this release is the Countryside Cuties stamp set. It’s got some sweet little birdies and great options for a scene for them. Plus the font used in this set is AMAZINGLY adorable!

I just knew I had to have these birds in a scene with a bright and shiny background. So once again I had to pull out the Distress Oxide Ink for some masking!

029

This card has me wishing it felt more like spring here! I hope you enjoyed my portion of the hop. I loved making these cards, so it’s so fun to finally be able to share them 🙂 Be sure to make your comments by March 13th at midnight to be entered for that gift certificate, and check the YNS blog on 3/15 for the winner announcements.

Here’s a great coupon code to use while you’re shopping the new release!

Here’s the link to keep hoping along on the blog hop! Just click the blue box and it will take you to the hop list.

Thank you so much for stopping by! Have fun on the hop, and have a great rest of your weekend!

Lucky to Have You

Hello, crafty friends! I’m back with another post to brighten your Tuesday! Today I’m working with the Lucky Friends stamp set as well as the Lucky die cut! These two products obviously pair super well together. Crazily enough, this was my first time getting to use the Lucky die, and I knew I wanted an all out bright, rainbow and leprechaun scene. Here’s a look at the card!

I started this card with a background that I ink blended Broken China Distress Ink over. I’ve been on a Perfect Pearls kick, so I spritzed the paper with my mini mister that has water and Perfect Pearls mixed in. The paper is 110 lb smooth white card stock from Michael’s, so it can take a little more water than the average paper. Once that was dry I stamped some of the clovers from Lucky Friends all over the background instead of clouds with VersaMark and heat embossed white embossing powder over it. I used a rainbow die cut and colored all of the stripes in ROYGBIV order and adhered that to the background with foam tape. For my ground I die cut another piece of paper and ink blended Lucky Clover and Twisted Citron Distress Oxide ink over the surface. That also got popped up with some foam tape.

I stamped, colored and die cut the cute little leprechaun and coins from Lucky Friends and adhered them to the scene as well. Then I cut out three of the Lucky word dies and layered them on top of each other for my sentiment. To finish the sentiment I stamped “to have you in my life” from Lucky friends on black paper with VersaMark and heat embossed it with white powder as well.

To finish my card I added some white Nuvo drops and white gel pen accents. I saw another crafter do the fun polka dot pattern on the leprechaun’s jacket, and I’ve been doing it ever since! I hope you enjoyed the card for today! I think I just needed some bright colors to keep my week moving, how about you? And now that we’re in to March, all I can think of is prepping for St. Patrick’s Day!

Thank you for stopping by, and I’ll see you again soon with another card!

Warm Winter Hugs

Hello, and welcome back to Creatively Cass! I’m back today with a card for Your Next Stamp’s February Feature Day which has the theme “Winter Warm Up.” We got to get creative and make a card or project around that theme, and here’s what I came up with!

015.jpg

I just had to use the cute little bundled up birdie from Merry Christmas Chickie for this card, because I feel like him all winter long when I wear my scarfs! I wanted to go with a fun pastel color combo, and Worn Lipstick, Wilted Violet, and Broken China were perfect for that!I carried the colors through all the coloring I had to do.

018

Be sure to head over to the Your Next Stamp blog to get all the details on how to win a gift certificate for the shop, and see all the other design team’s projects! Thank you so much for stopping by!


Baby Has Arrived!

Hi, crafty friends! It’s Cassie here, and I’m back at the Heffy Doodle blog to share a baby card I made for a coworker. I love the spring Heffy Doodle stamps with their cuddly and cute look because they’re just perfect for this kind of sweet card!

I started by stamping and coloring all the cute little images shown from the Honey Bunny Boo and Eggcellent News stamp sets. I used my Copic Markers to color them in, and then used their coordinating dies to cut them out! Aren’t they so cute?! Next I took a piece of 110 lb smooth white cardstock from Michael’s and die cut a stitched heart from the center. I wanted to use the heart to create the scene for this little critters. To create the clouds in the sky I used my ink blender and the Broken China Distress Oxide ink with a cloud stencil. I cut another heart and used a stitched hillside die to create a ground for the animals to stand on. For the grass I used my favorite green combo Twisted Citron and Lucky Clover.

I took the negative of the A2 panel that I cut the heart from and ink blended Carved Pumpkin Distress Ink over the edges. I also spritzed water over the orange piece to get the distressed look that I love so much! Once that was dry I adhered it to a card base. The heart was popped up with foam tape. All of the cute little images were adhered with glue dots or foam tape if they hung over the side of the heart.

I hadn’t thought about my sentiment before adhering everything, so it was Misti to the rescue! I stamped the ‘baby’ sentiment from the Eggcellent News set and heat embossed gold embossing powder over it. Then  created a banner for the rest of the sentiment with white embossing powder.

That’s it for me today! I hope you enjoyed the card I made. Are you making any congratulation cards for those expecting? I’ve got two now that need stamps to mail out! I hope you all have a great day, and thanks so much for stopping by!

Your Next Stamp January Preview!

Hi everybody and welcome back! It’s been a crazy busy week, and on top of that the design team at Your Next Stamp has been gearing up for the January release! Woot woot! It’s been quiet around here, but the party is starting up again!

Today I’m sharing a card I made for the Preview Day over at YNS to get you all excited abou the new release. Trust me. There’s lots to be excited about! Let’s take a look at my card.

040

Aren’t these two little penguins in love from the Penguin Love set just the cutest!? They’re adorable, and so are the little heart ice chunks floating around them 😀 I colored them with my Copic Markers and die cut them out with the coordinating dies.

024


To create some more snowy ice chunks I die cut some ovals with the Stitched Ovals Dies and adhered them down over my Distress Inked background.  My sentiment comes from another new set called Whatnot Sentiments Eleven, and there are so many great sentiments in this set for just about any occasion!

019

Be sure to check out the other design team members projects and head over to Your Next Stamp aka January release central. And be sure to stop back later for a great blog hop with a chance to win prizes, and a coupon code! Thanks so much for stopping by, and I’ll see you again soon with another card.

You’re a Gem

Hello again, crafty pals! It’s Cassie here, and I’m back today with a bright card to kick off the new year! I hope you all had a lovely holiday and a happy new year. I can’t believe it’s a new year but it just means it’s time to reevaluate goals and get motivated to accomplish even more!

Alright, let’s get on to the card! I did some die cutting, heat embossing and ink blending to create today’s design.

I started by taking all of the gem shapes from the Geology Rocks coordinating die set and arranged them from top right corner to bottom left aross an A2 size panel. I ran it through my die machine, and grabbed a blank A2 size piece of Neenah Solar White card stock. Lining the two pieces up, I used some low stick washi tape to hold them together so that they didn’t shift at all for the next step.

I dabbed my powder tool over the die cut areas, and then stamped the matching gem from the Geology Rocks stamps set over the hole in VersaMark ink. Once everything was stamped I carefully removed the top piece with the die cut pieces and used clear embossing powder and my heat gun to heat emboss the gems. I did this so that when I ink blended over them, the image of the gem would resist the ink and still show up! It’s such a pretty technique. Once everything was heat embossed I used my little ink blenders to add color in rainbow order to the gems. I used Festive Berries, Spun Sugar, Carved Pumpkin Mustard Seed, Twisted Citron, Cracked Pistachio, Peacock Feathers, Wilted Violet and Picked Raspberries.

To finsih the card I stamped the sentiment “You’re a Gem” onto black cardstock and heat embossed it as well. Then I trimmed down the words and adhered them to the card with foam tape. I attached the front panel to a card base and my card was complete!! This will be perfect to send out to someone special after I was a bit spoiled this Christmas. It would also be perfect for a lot more occasions!

I hope you enjoyed the card for today! Have you given any of these techniques a try? The stamping through die cutting was a new one for me, but I really liked it! What are your crafty new years resolutions and goals? One of mine is to be more organized in general, but especially when it comes to crafting. I appreciate all of the love and support I’ve gotten this year, and I can’t thank you enough for being a part of that. Cheers to the start of a great year!

Kisses & A Fun Filled Christmas

Hello, crafty friends, and Merry Christmas!! It’s Cassie here, and I’m sharing one last holiday card with you. Today I’m spending the day with my family and eating way too many frosted cookies! But first I have a cute card to share with you.

I started today’s card by creating a pattern background. I stamped the two outline hearts from Happy Snappy Crocs in VersaMark ink all over a piece of Neenah Solar White card stock. Then I used clear embossing powder to heat emboss so that I could do a resist technique. I used my Festive Berries, Worn Lipstick and Spun Sugar to create a ombre over the hearts.

Next I stamped the mistletoe, and two cute elves from Elfish Antics with A Copic safe ink. I colored them in with my Copics with some non traditional Christmas colors. I saw Lesley add stripes to the girl elf’s leggings and I had to give it a try. It turned out SO cute! Once everything was colored I die cut them out with the coordinating dies.

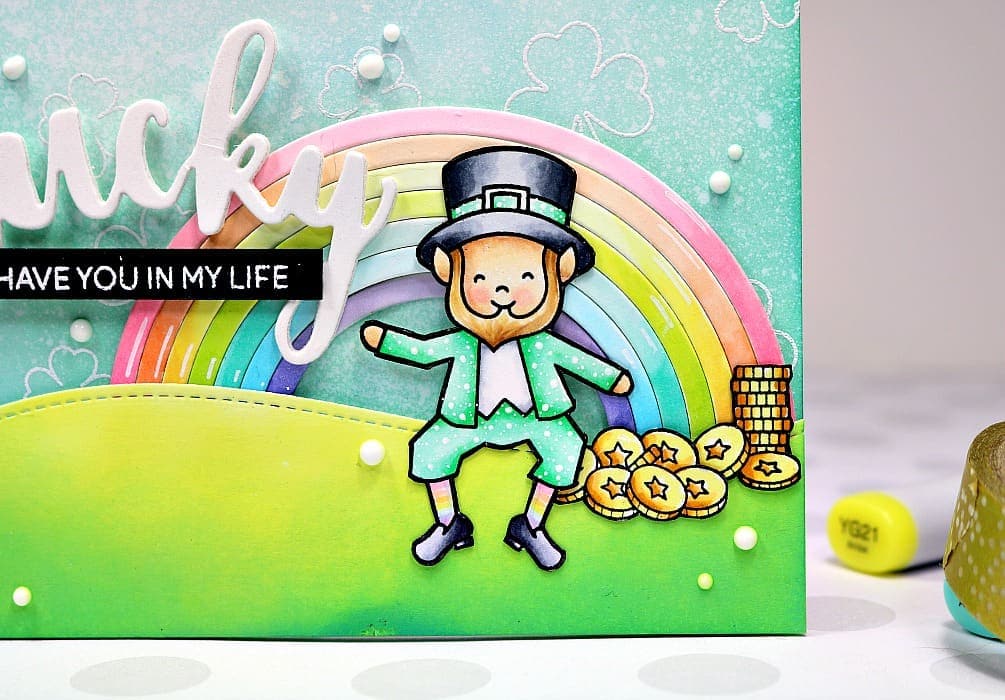
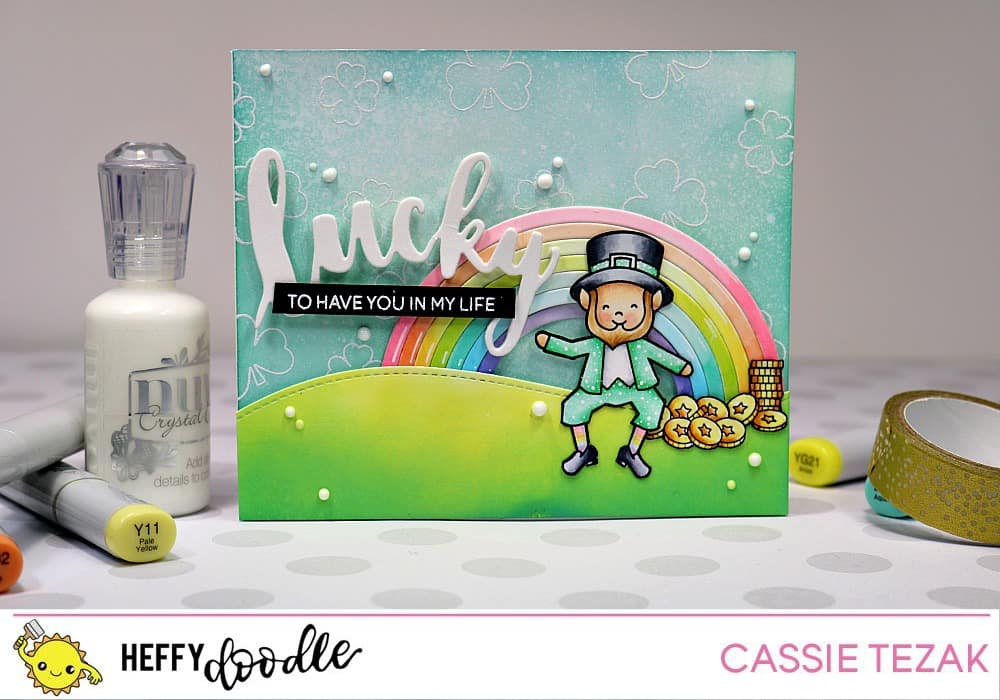
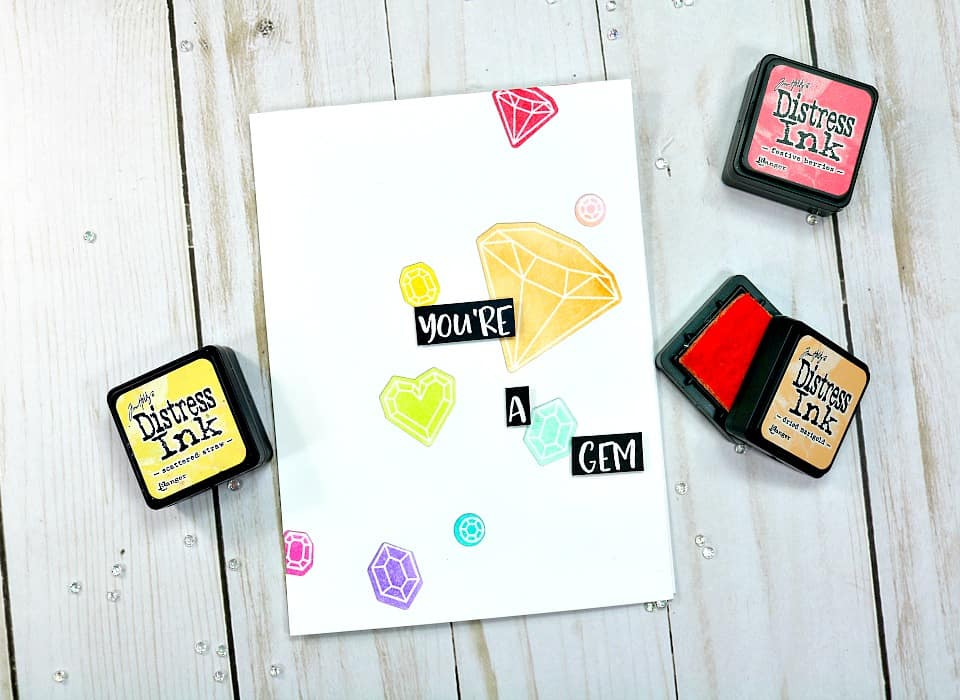
 I created my sentiment by stamping a mix of words from Elfing Christmas Words and Winter Hugs to make my own sentiment. I stamped the words in VersaMark on black cardstock and heat embossed white embossing powder over top. Then I trimmed them down.

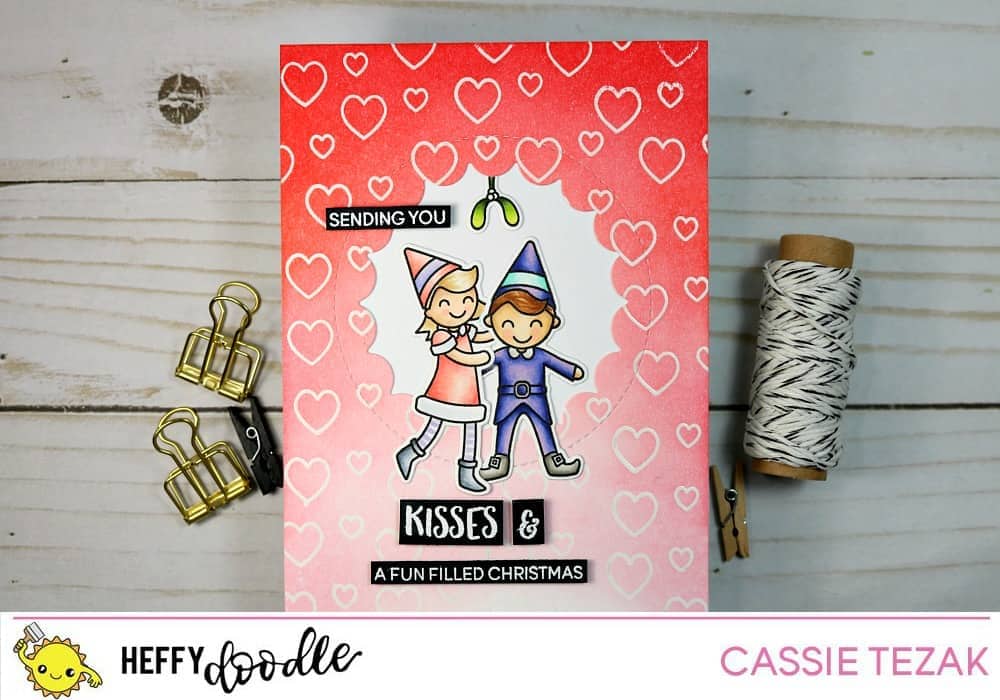
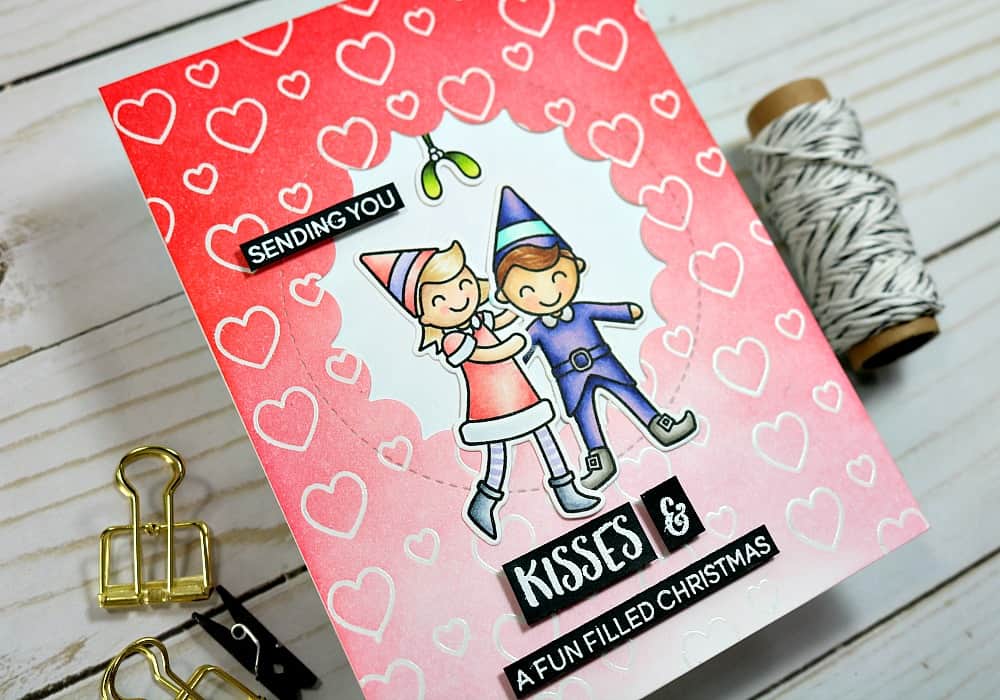
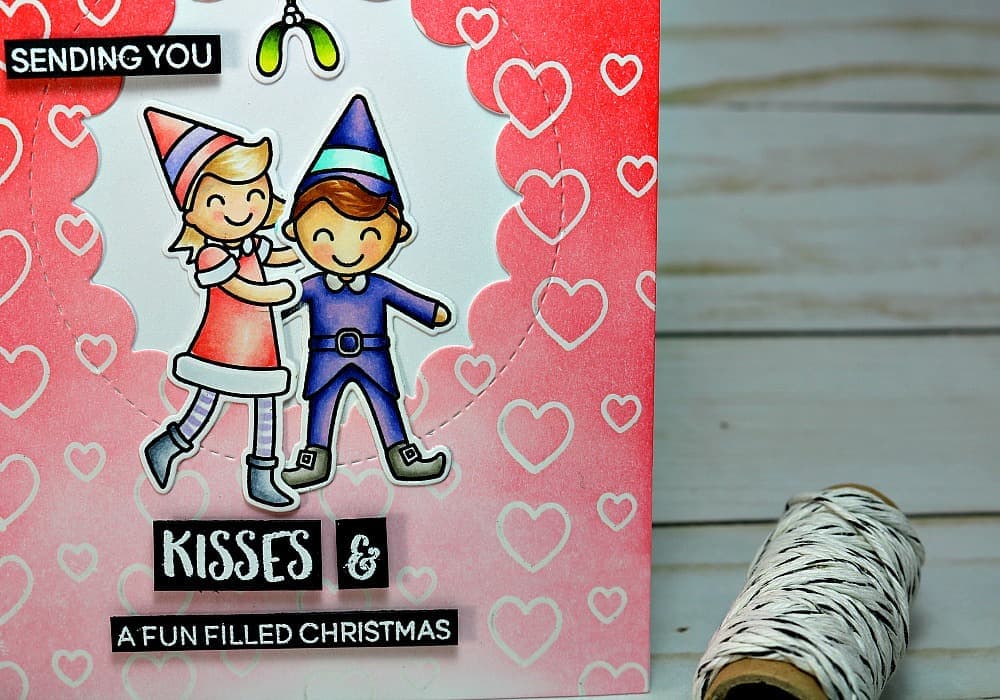
To finish my card I die cut  fun stitched circle scallop in the center to make elves stand out a little more. Then I adhered all the pieces to my card panel and adhered that to a card base. I popped the sentiment up with foam tape and tucked the mistletoe into the scalloped circle.

And that’s it for my card today! I hope you enjoyed it. I hope you’re all having a great Monday, and a happy holiday! Thanks so much for stopping by. I’ll see you again soon with another card!!

Your Next Stamp Challenge #79

Hello everyone! Welcome back. Today I’ve got a quick post to share with you. I’m sharing the card I made for the Your Next Stamp challenge. The fun new sketch and color challenges are show below:


And here’s my card for today!

015x.jpg

I used the adorable Reindeer from the Be Merry set and colored him in with my Copic markers. I die cut the Snowflake Panel die and did some ink blending over it to incorporate the colors for this week.

014

To finish off the card I used the sentiments from the Holiday Reindeer set! And that’s my card for today! Be sure to stop over at the Your Next Stamp blog and join us in this challenge! You could win a gift certificate to the YNS shop if you do!

Thanks so much for stopping by. I hope you’re all having a great day. See you again soon with another card!