Heffy Doodle New Release Hop!

HeffyFriendsHopJuly19.jpg

Hi, everyone! Welcome back to the blog! Today I’m sharing a card for the Heffy Doodle new release blog hop. The release is available now, and you’re going to want to get your hands on everything! There is so much cuteness in this release. You’re going to love it 🙂 Let’s jump right in to it!

IMG_3773

How sweet is all this?? I used the adorable new Absotoothly Awesome stamp set and the umbrella from Quack Me Up for my main images. I also used the Sunshine die and new Rascal Alphabet stamps and dies to create my own sentiment.

IMG_3775I also used the Rain on My Parade stencil with the Silver Linings cloud dies to create the background. I just love how this all paired together!

IMG_3781

And that’s my card for the hop! I hope you enjoyed it. Be sure to keep hopping and leave comments on the posts to enter yourself for a chance to win a certificate to the Heffy Doodle shop!

Here’s the line up – make sure you didn’t miss anyone!

Heffy Doodle

Ali Farmer

Isha Gupta

Cassie Tezak

Tallie Clewley

Kelly Martin

Jessica McAfee

Lesley Oman

Peace

Hi, everyone! If you can believe it, it’s already time for the June release from Your Next Stamp! I’m here today to share a preview project that I made using some of the new goodies. It’s an adorable release!

IMG_3734

This new t-shirt stamp set is so adorable and fun! And I just love the new circle panel die. I can never have enough of the YNS panel dies – they’re so cute! There are a lot of sneaks from the team, so be sure to check out the YNS blog. And tomorrow we’ll have a hop to celebrate the new release! Thanks so much for stopping by, and I’ll see you again soon with another card!

Your Next Stamp Preview

Hi everyone! I’m stopping by today to share my card for the Your Next Stamp preview day for the May release! This release is so cute. I can’t wait to share everything with you. But for now…this sneak peek will have to do!

IMG_3646.jpg

How cute are these new stamps?? There are so many coordinating stamps and dies that are perfect for baby congratulations. I just love these cute block stamps too. You could customize cards or projects with them, or use them as an accent like I did here. Tomorrow we’ll have a blog hop to share the whole release! Stick around to join in all the fun. Thanks for stopping by and I’ll see you again soon with another card!

Heffy Doodle & Chibitronics Collab!

Hi, everyone. I’m super excited to share a card I made for today’s post with you. It features products from both Heffy Doodle and Chibitronics! We were super lucky to be able to team up with the Chibitronics team and make some awesome cards for this hop. You can win a Chibitronics Starter kit and a £50 Heffy Doodle gift certificate! Two winners will be chosen May 6th 🙂 Here’s the fun card I came up with.

IMG_3573

I started the card by planning out my circuit. This meant I drew a rough sketch of my card and then started creating the card. I used my Distress Oxide Sprays to create the background. This was fun, and super easy. I just sprayed Worn Lipstick, Spiced Marmalade and Fossilized Amber over an A2 card base and that was it! I let the sprays do there thing, and completely dry before I came back to die cut the hearts from it.  Once the hearts were die cut I took a piece of vellum and my Misti and stamped the hearts from Eggcellent News and heat embossed them with white embossing powder. Beneath the hearts is where I put my Chibitronics red light bulbs from the starter kit. The starter kit has everything you need to make your first light up design!

IMG_3577

I made sure to get my copper tape circuit right where I needed it to be to get the lights to work, and did a lot of testing before I moved on to make sure I wasn’t going to run into any problems after the card was put together. Then I added foam tape around the battery and card base so as to give the battery room so that the lights weren’t on all the time.

I used the Grassy Lass border dies and Stitched Slopey Joes border dies to create some dimension below the volcano that I stamped from the Geology Rocks stamp set. I also stamped out all of the dinosaurs from the Dino Time stamp set. These cuties just go so well with the volcano-I couldn’t pass up using them to finish my scene!

IMG_3578

I also couldn’t resist adding a speech bubble from the Whatcha Sayin stamp set for the T-Rex. Too cute! I finished the card by heat embossing the sentiment “I Lava You” and adhering it to the bottom of the card.

IMG_3579

All right! That’s it for my card, but be sure to hop along to the rest of the projects and leave some comments for your chance to win! Thanks so much for stopping by today! I hope you enjoyed my project and get inspired to make some cool light up cards 🙂 I’ll see you again soon with another card!

Heffy Doodle

Koren Wiskman

Kelly Griglione

Jessica McAfee

Wei Wei Wang

Francesca Vignoli

Yukiko Sugiyama

Isha Gupta

Eiko Uchida

Ali Farmer

Kelly Szafron

Cassie Tezak

Vanessa Reinheimer

Yukiko Inami


Your Next Stamp April Release!

April2019HopBadge

Welcome back! The Your Next Stamp April release is here, and it’s so sweet. We are kicking it off with a blog hop. I had so much fun making the card for today. Let’s get right to it.

IMG_3374

I made this card by die cutting the Cool Tags Five dies and creating a spot for the cute little fairy and dragonflies from the Wishing Well Fairy stamp set. I colored in some of the images from the set and arranged them around the tags. I also stamped one of the sentiments from the set on the smaller tags and popped it up with foam tape. I used more of those awesome sparkly gumdrops from the new release! I love that the purple ones actually look like gumdrops! This release is so cute and you’re going to want to see it all. Be sure to keep hopping along by clicking the blue button below. Leave a comment to enter yourself to win a gift certificate to the YNS shop!


Also, don’t forget to use the coupon for your orders placed through April 8th! Thanks so much for stopping by today. Have fun hopping along!

April2019SaleBadge.jpg


Create A Smile Challenge

Hi, all! I’m just popping in to share my card for the newest Create a Smile challenge. The new theme is ‘crafty friends.’ What a great theme to create around, right??

IMG_3383

I made this card cute and simple, using the adorable Bear Mail stamp set and creating my own sentiment with the Tiny Letterings stamp set. Be sure to head over to the Create a Smile blog and see the rest of the teams work! Thanks for stopping by 🙂

Your Next Stamp April Preveiw

Hi, everyone! I’m back today to share my card for the Your Next Stamp preview day. The new release is so cute and I think you’ll love it. Here’s my sneak peek for you!

IMG_3372.jpg

I used the new Wishing Well stamp set for this card along with the Cool Tag Four dies to create this highlighted colored portion of the card. I also used some of the new sparkly gumdrops from the April release. They’re so pretty!

I hope you liked the card for today. Want to see even more awesome sneak previews from the April release? Head over to the Your Next Stamp blog and see what the rest of the design team has created. Thanks for stopping by!

You Are Souper

Hi, everyone! Happy Monday. This week is going to be a busy week for me, so I decided to make an encouragement card for today’s Penguin Palace post. Anyone else needing a little encouragement to get through Monday? Let’s jump in!

IMG_3358

I started the card for today by die cutting two of the Cross Stitched and Dots Large and Small die sets. The larger one I die cut from some light gray card stock and the smaller from some white card stock. I love the detail that these dies add to a card. It’s so sweet.

IMG_3360

Next I did some creative masking to stamp out the “you are” sentiment from the Get Well Soon stamp set. I love searching other stamp sets to create my own sentiments. To finish the sentiment I die cut some of the Heffy Doodle alphabet dies to spell out “souper” from white card stock. I colored the letters in with my Copic markers for a fun pop of color.

IMG_3361

Finally, I stamped out the chef from the It’s Your Day and colored him in with my Copics. I used the coordinating dies to cut him out and popped him onto the card with foam tape. And that finished my card for today! I hope you enjoyed this creation, and that it brightened up your Monday a little 🙂 Thanks so much for stopping by today. I’ll see you again soon with another card!

Happy Birthday!

Hello, everyone! Happy Monday. I’m back today to share a cute and simple birthday card I made by mixing some new and old Penguin Palace products. Let’s jump right in.

IMG_3328

I started by doing some ink blending with a stencil I made using the new It’s Your Day Bubble Call-Out die. Using the negative of the die cut I ink blended some Distress Oxide onto an A2 size card panel. I positioned it so that it hung over the top edge of the panel, and splatterd some water droplets over it for a textured look.

IMG_3329

Next I die cut one of the borders from the Fancy Hearts Scalloped Boarders die set to use as a frame on the card. I colored the frame with one of my Copic markers. That piece was adhered to the card panel with a liquid adhesive.

IMG_3330

Finally, I stamped and colored one of the adorable unicorns from Birthday Unicorn stamp set. Once it was colored I die cut it out with the coordinating dies and adhered it with some foam tape below the speech bubble. After adding some white gel pen details to the card it was complete! I hope you enjoyed this card I made for today. Be sure to check out all the newly released products from Penguin Palace! Thank you for stopping by today, and I’ll see you again soon with another card!

To Some Bunny Awesome

Hi, everyone!  I’m back to share my project for today. I decided it was time to use the Mark My Words bookmark dies. I have a lot of family and friends who I know are going to love getting some adorable bookmarks with these dies! For today’s bookmark I decided to go with a spring/Easter theme.

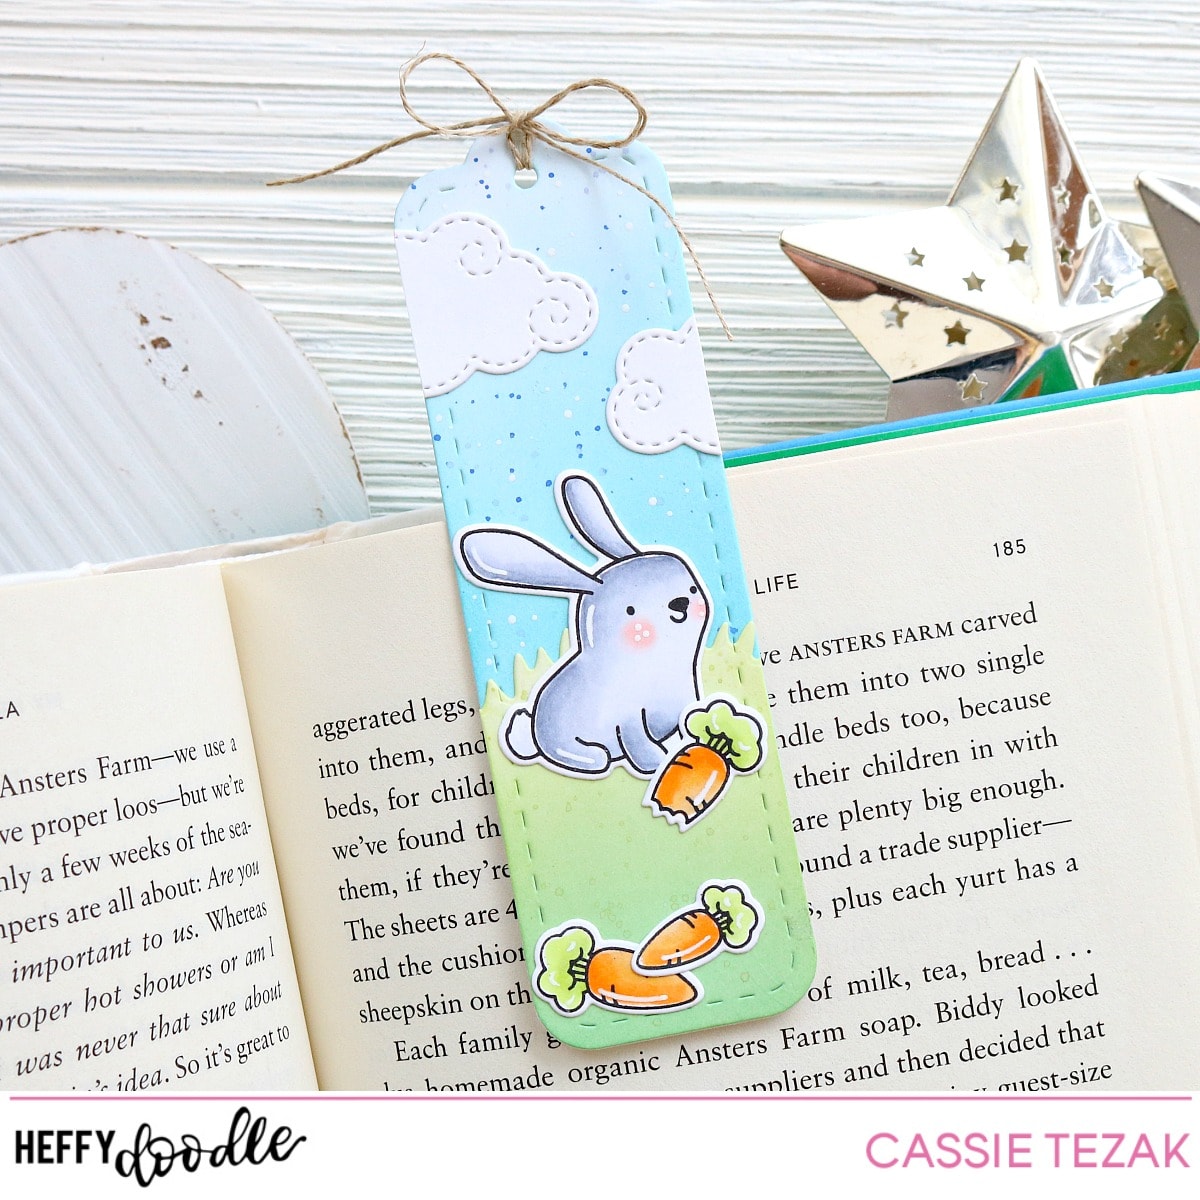
I started by die cutting three of the same bookmark shapes. There are two designs in the set, but I wanted to use some twine on mine, so I went with the one that had the hole at the top. On one of the bookmarks I ink blended Broken China and Tumbled Glass Distress Oxide over it. Then I splattered it with Blueprint Sketch and Milled Lavender Distress Oxide that I’d watered down a little. Over the second book mark I ink blended over the entire die cut piece with some Distress Oxide that I’d mixed myself with reinkers. Finally, for the last bookmark, I used the Grassy Lass Border dies to cut the bottom off. Then I ink blended Twisted Citron and the hand mixed green-ish color I used for the back side. All three pieces were set aside to dry completely while I worked on the other pieces.

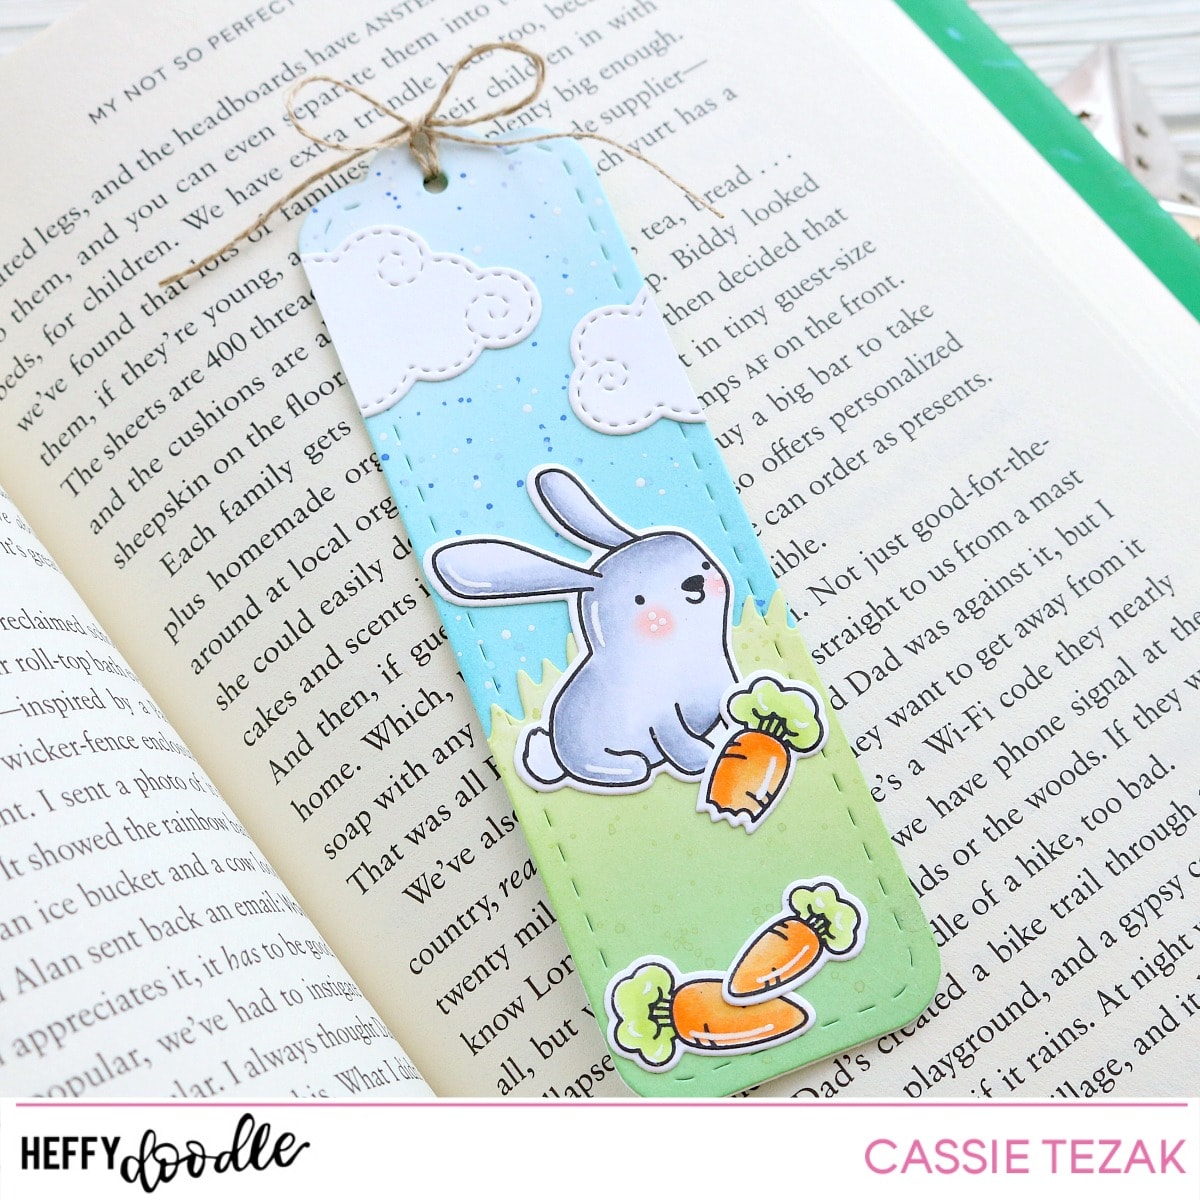
I stamped out the bunny and carrots from the Honey Bunny Boo stamp set and colored them in with my Copic markers. Then I die cut them out with the coordinating dies and added some white gel pen details. I adhered the grass bookmark bottom to the blue bookmark, as well as the bunny and carrots. I decided I didn’t like how empty the top was, so I went ahead and die cut some of the Swirly Clouds and adhered them down, trimming off the part that hung over the edge.

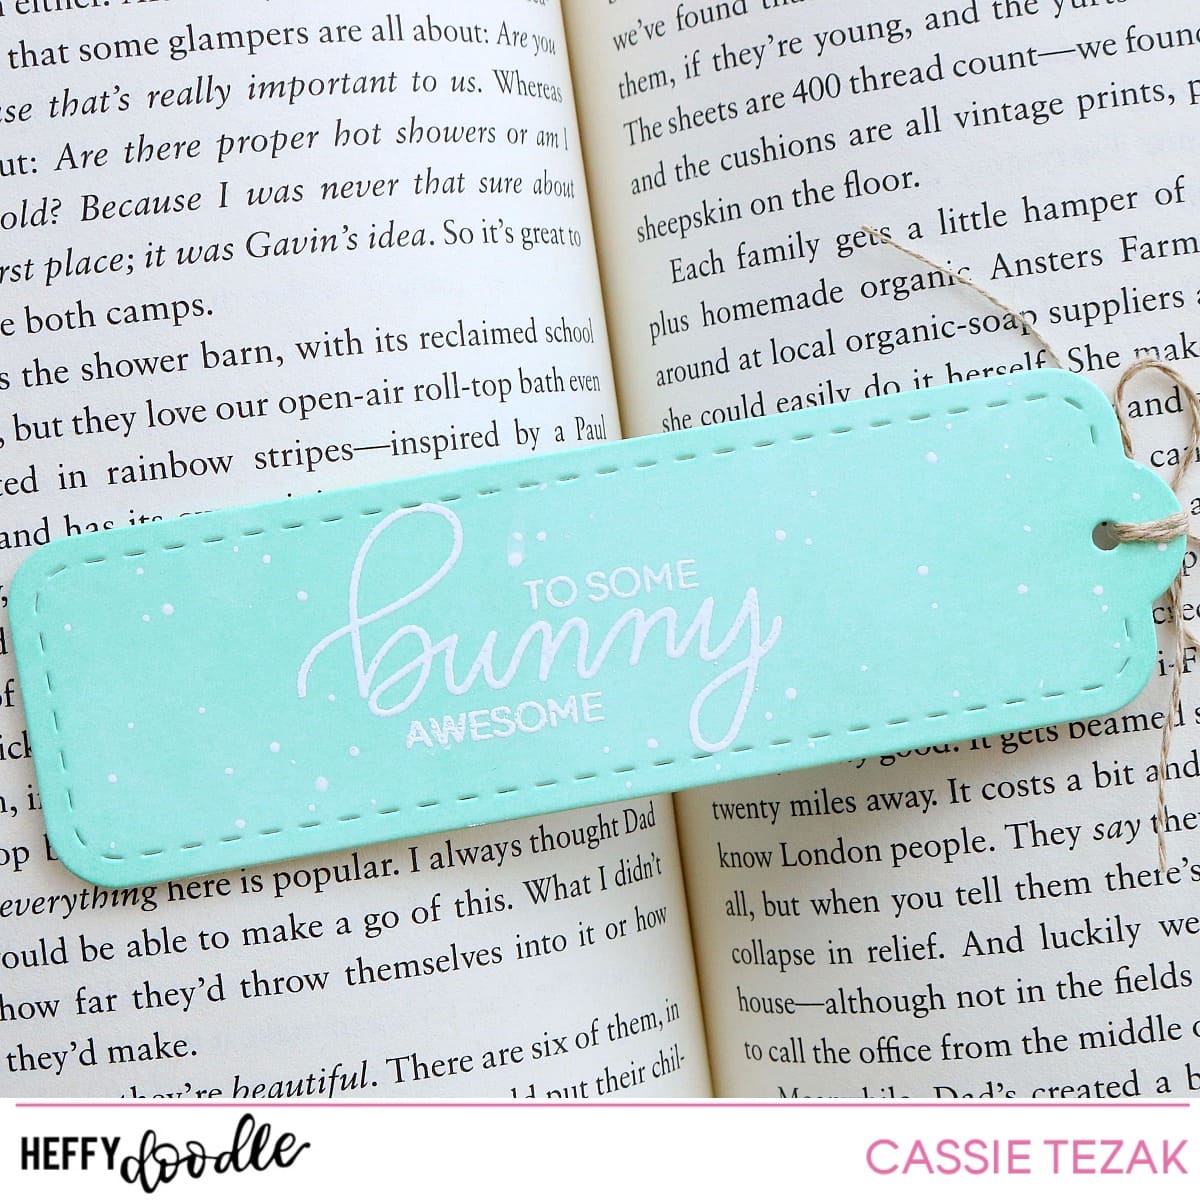
For the back of the bookmark I heat embossed a sentiment from Honey Bunny Boo, mixing two of the fonts. I like the way the ‘bunny’ is so big and pretty! I added adhesive only to the top 1/2 inch of the bookmark, so that the two pieces could be sandwiched together and be used like a clamp. To finish off the bookmark I added white dots to the back side, and a dainty twine bow at the hole at the top. And that’s it for my project today! I hope you enjoyed it! I have a feeling this is going to be sent out in an Easter care package to one of my friends 🙂 Thanks so much for stopping by today! I’ll see you again soon with another card!
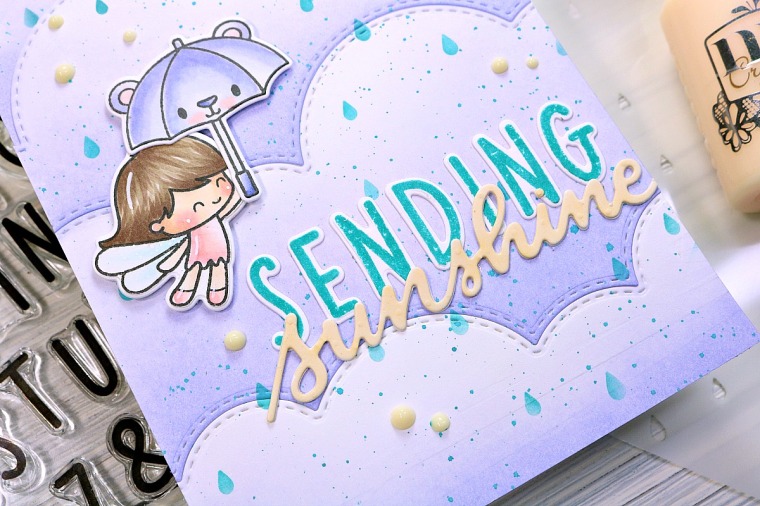