Pink & Main 5th Birthday Blog Hop!

53874933_10218851983109936_5485552923603632128_o

Hi, everyone! Welcome to my stop on the Pink & Main 5th birthday blog hop!! Who doesn’t love a birthday celebration?? There are so many fun projects and some amazing prizes to be won. But first, let’s get to my card!

IMG_3292

I started this card by die cutting the Celebrate die from a piece of A2 size white card stock. I did both the outline and the word celebrate, setting the word aside to use later. Then I got to stamping! I stamped out the four different balloon designs in Pumice Stone, Fossilized Amber, Worn Lipstick and a greenish blue Distress Oxide Ink. The greenish blue ink was one that I created using Distress Oxide reinkers and a custom Distress ink pad. If you haven’t tried that yet, you definitely should!

IMG_3296

I let the ink dry completely, helping it along with my heat tool, and then I stamped the cute designs over each balloon in VersaMark ink. I heat embossed them all with white embossing powder. I think the designs for these balloons are SO cute! They add so much character to them, and are such a cute detail. Once that was done, I stamped the balloon tails and some confetti in the open spaces of the card panel. It’s hard to see in the photos, but is a nice subtle finishing touch for the balloons.

IMG_3297

To finish my card I put a piece of yellow card stock behind the opening that I die cut and then adhered the ‘celebrate’ die cut to that. I attached the whole panel to a card base and stamped the “let’s” from the Celebrate stamp set to finish the card!

Alright, ready to try your hand at winning some prizes? There are going to be five random winners picked from comments left on each bloggers post. You could win $50 to the Pink & Main store just by leaving some comments!

Your next stop is: Donna! So be sure to keep hopping and leave some awesome comments!

Thanks so much for stopping by today! I hope you enjoyed the card I created! I’ll see you again soon with another card 🙂

Hello!

Hi, everyone! It’s Cassie here from Creatively Cass and I’m back to share a cute card I made for the blog today! I absolutely missed the St. Patrick’s day window this year, but I still wanted to get a rainbow card in, and this is what I came up with.

I’ve had the Rainbow Wishes die set from Concord & 9th forever, and it was time to finally use it! I die cut some of the rainbow pieces out of the new Lawn Fawn card stock colors Pencil Eraser, No. 2 Pencil and Sage Leaf. I love these new colors and can’t wait to use them again! I also die cut some Heffy Doodle Swirly Clouds dies from a light gray cardstock. Then I used Black Soot Distress Oxide ink to darken up the bottoms of them a little.
I die cut the Stitched Cloud Backdrop die from white card stock and heat embossed some little stars all over the panel with gold embossing powder. I thought this added a cute touch to the background, without adding any competing colors. I also ink blended some Pumice Stone Distress Oxide in the corners and splattered a little bit of the color watered down for some more texture. I stamped out the cute little cat from the Mama Elephant set Book Worm and colored him in with my Copic markers. I kept the coloring really simple, and I love the way it turned out so soft. I popped everything up with foam tape and adhered it to the card base.
To finish off the card I heat embossed a simple hello from the Concord & 9th set All Year Long onto some black card stock. This too was popped up with some foam tape. The last little details I added were white gel pen on the rainbow, clouds and kitten. And that’s it for my card today! I hope you enjoyed it. I had fun making it! Thanks so much for stopping by today! I’ll see you again soon with another card 🙂


It’s Your Day!

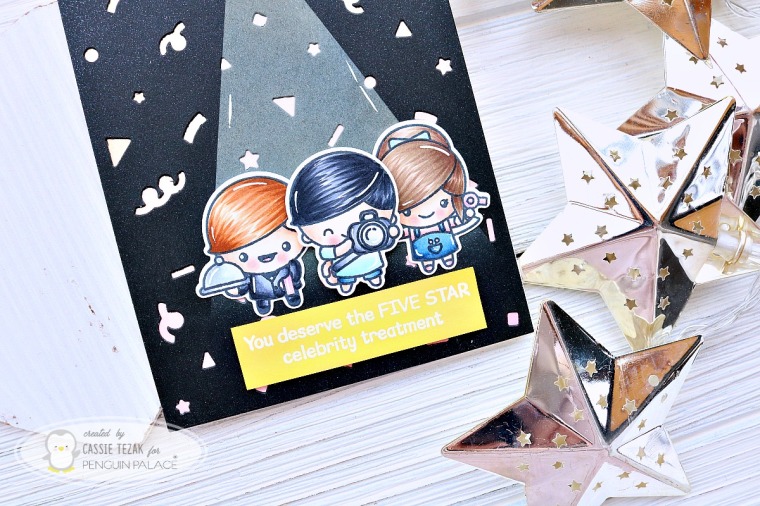
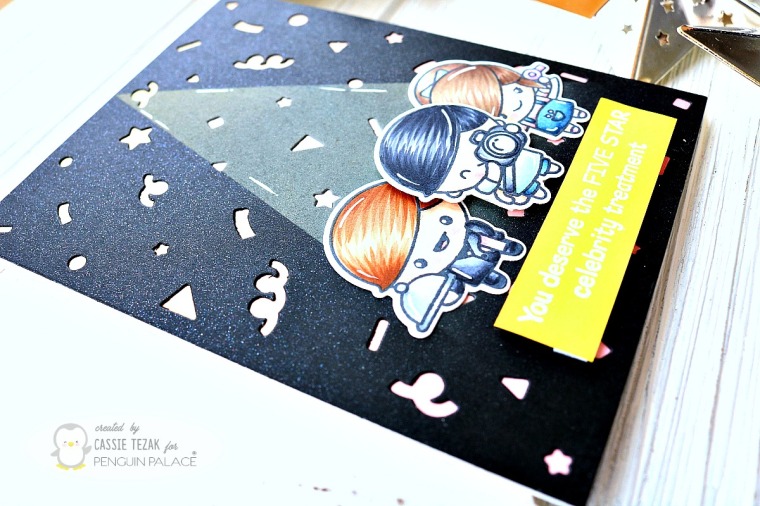
Happy day three of previews for Penguin Palace’s new release! Today I’m sharing my card for the It’s Your Day stamp set. I used some of the adorable people images from this set to create a look as if the recipient is getting the celebrity treatment. My inspiration was the red carpet and I wanted this to look like a movie premier or some exciting party! IMG_29920.jpg

There are so many fun sentiments in this set, and the people are so cute & go with them perfectly. I loved creating the spot light for this card by doing some easy masking and the confetti was achieved with a panel die.

IMG_2999

There are so many fun projects you could make with this, and let’s face it-who wouldn’t want to be given celebrity treatment for the day!

IMG_2998

Thanks so much for stopping by today! Be sure to see all the previews on the Penguin Palace blog! I’ll see you again soon with another card!

Penguin Palace Preview Day 2!

Hi, everyone! I’m stopping by quick to share my card for day 2 of the previews for Penguin Palace’s new release. Sharon has all the cards on the Penguin Palace blog, and today we’re sharing our creations featuring the My Best Pal stamp set. This is such a cute stamp set with some cute dogs and lots of unique sentiments. Here’s the card I created.

IMG_2788

How cute is that pup with the balloons?? Another favorite from this set is the beautiful ‘happy birthday’ stamp which has a coordinating die to cut it out! Love that!

IMG_2790

I also think the other images in the set are perfect for scene building, and some could work on their own or with other stamp sets which is always a plus! Check out the Penguin Palace  blog for more great projects and keep watching for more previews! Thanks so much for joining me today, and I’ll see you soon with another card!

Spellbinders Watercolor Card

Hi everyone! I’m back to share another card today. This time I’m showing a card I made for Spellbinders using their brand new Just Add Color collection by Stephanie Low. There are tons of beautiful red rubber stamps in this release, and it was so fun to play with them! It’s not often I use red rubber anymore, but each time I do I’m reminded of how amazing they stamp. Let’s get to my card!

IMG_3212

I created a simple, yet lovely card using the Floral Love stamp set. This stamp was so beautiful I knew I wanted to heat emboss it and watercolor it…so that’s just what I did! Using my Misti stamping tool I stamped the image once and water colored it in. Then I stamped it once more over top of the dried painted image with VersaMark and heat embossed gold embossing powder over top.

IMG_3215

I just love the way it turned out. So much so that I decided to leave the front blank and only add a sentiment to the inside of the card. Of course I had to add splatters and some more loose water coloring around the heat embossed image though! I hope you enjoyed the card I made using the new Just Add Color collection from Spellbinders. Be sure to check out the rest of the release, as it is beautiful! Thank you so much for stopping by today! I hope you’re having a great day, and I’ll see you again soon with another card!

Hello My Friend

Hello, friends!  I’m back today to  share another fun Heffy Doodle card with you all. Today I’m using lots of dies for this cute dino card. Let’s jump right in!

IMG_3196c

I started by die cutting the two tag pieces from the Tag Along dies. The full piece from white card stock and the frame from gray card stock. On the white full die cut I used the Rays the Roof stencil to create the rainbow of rays for the background. I also splattered some gold paint over the piece, as I knew I was going to be using more gold later in the card. I adhered the frame to the piece and tied some black and white twine through the hole at the top.

IMG_3197sc

The next thing I did was die cut one of the larger squares from the Stitched Square Dies set and ink blended some Broken China Distres Oxide ink over the entire piece. I also splattered this piece with gold paint and some of the Broken China ink for some texture and interest. I love to splatter everything!

IMG_3199ff

Next came a lot of die cutting! I die cut all of the different sizes of the Dino Prints dies from white card stock, vellum and gold glitter card stock. Then I arranged the dino prints die cuts all over the square. I heat embossed a sentiment from Whatcha Sayin’ on one of the tiny prints. Once all the footprints were adhered down I adhered the tag down as well with foam tape, and added the final footprints to the tag with the sentiment. Finally, I had one of the dinosaurs from Dino Time already colored and ready to go, so I adhered him to the tag to finsih it off! I love having pre colored and cut images just for that reason 🙂 And my card was finished!! I hope you enjoyed the card I created today. It was heavy on the die cutting, which was fun for a change. Thanks so much for stopping by, and I’ll see you again soon with another card!

Stamp a Background –Create A Smile

Hello! I’m back with another post today, this time for Create A Smile! We have a new challenge going on and the new theme is “stamp a background.” I tried to think outside the box with this one, and here’s what I came up with!

IMG_3152

Instead of coloring the image I stamped, like I normally would I colored the background! I stamped this adorable sloth from the Poppin’ Over stamp set in rows across an A2 size card panel. Each time I drew a line with my ruler before stamping to ensure I got them straight. Once they were all stamped I did simple coloring with my Copics to create the rainbow background.

IMG_3154

The only color I added to the sloths was some pink to their cheeks. I also splattered some white paint over the panel, just to distract from any flaws in my stamping or coloring. Plus, I love  splatter!!

IMG_3153

Next I heat embossed the word ‘you’ from the All About You stamp set on some vellum and fussy cut it out. I also heat embossed a coordinating sentiment on some craft card stock and trimmed it down as well. Both pieces were adhered to the card panel with foam tape. And that finished off my card! I hope you enjoyed this bright and colorful take on the newest Create A Smile challenge! Be sure to head over to the CAS blog and see the rest of the team’s creations and join in the fun. Thanks so much for stopping by today, and I will see you again soon with another card 🙂

Your Next Stamp March Preview!

Hi everyone! It’s time to share the March preview for the Your Next Stamp release! I can’t believe it’s March already. Where did February go? It’s all for the best though, because the March release is so fun! Let’s take a look at my project.

IMG_3102

How sweet is that cute raccoon?! I think he’s going to be adorable on some spring cards. Also, how amazing is that background panel die?!? Instead of die cutting it I embossed it into some sky blue card stock. I just love the flowery pattern and the awesome texture it gives. Be sure to head over to the Your Next Stamp blog and see the rest of the team’s creations for the preview! And don’t miss the full reveal tomorrow! Thanks so much for stopping by, and I’ll see you again soon with another card 🙂

Create A Smile March Release!

Hello everyone! I’m so excited to share a card I made for the new release from Create A Smile! The March release has some beautiful spring stamps and a gorgeous alphabet set. Here’s a look at one of the cards I made:

49946884_734960860219246_4277961080933711872_n

I just love the cute Easter eggs and adorable chicks and bunnies in this set. If you haven’t yet, be sure to head over to the Create a Smile shop and see the entire new release, as well as the design team’s awesome creations using it! Thanks for stopping by today, and I’ll see you again soon with another card!

Pastel Inspiration

Hi, everyone! I hope you’re all having a great start to your week. I’m popping in quick today to share a card I made for Craftin’ Desert Divas. Todays card was inspired by the creative challenge on the CDD blog. The theme is pastel colors! I love pastels, so this was super easy to go with. Here’s the card I came up with.

IMG_2867.jpg

I had this lamb from Wooly Lambs already colored up, so I decided to go with a simple card for the design. I embossed the Burst Stencil to give a focal point on the card, and ink blended Shaded Lilac and Spun Sugar Distress Oxide ink over the center of it. Then I heat embossed a sentiment, and added the lamb with some foam adhesive. To finish off the card I added some white gel pen accents, and the card was complete! I hope you enjoyed this card for today. Thanks so much for joining me, and I’ll see you again soon with another card!!