MFT – A Friend Like You

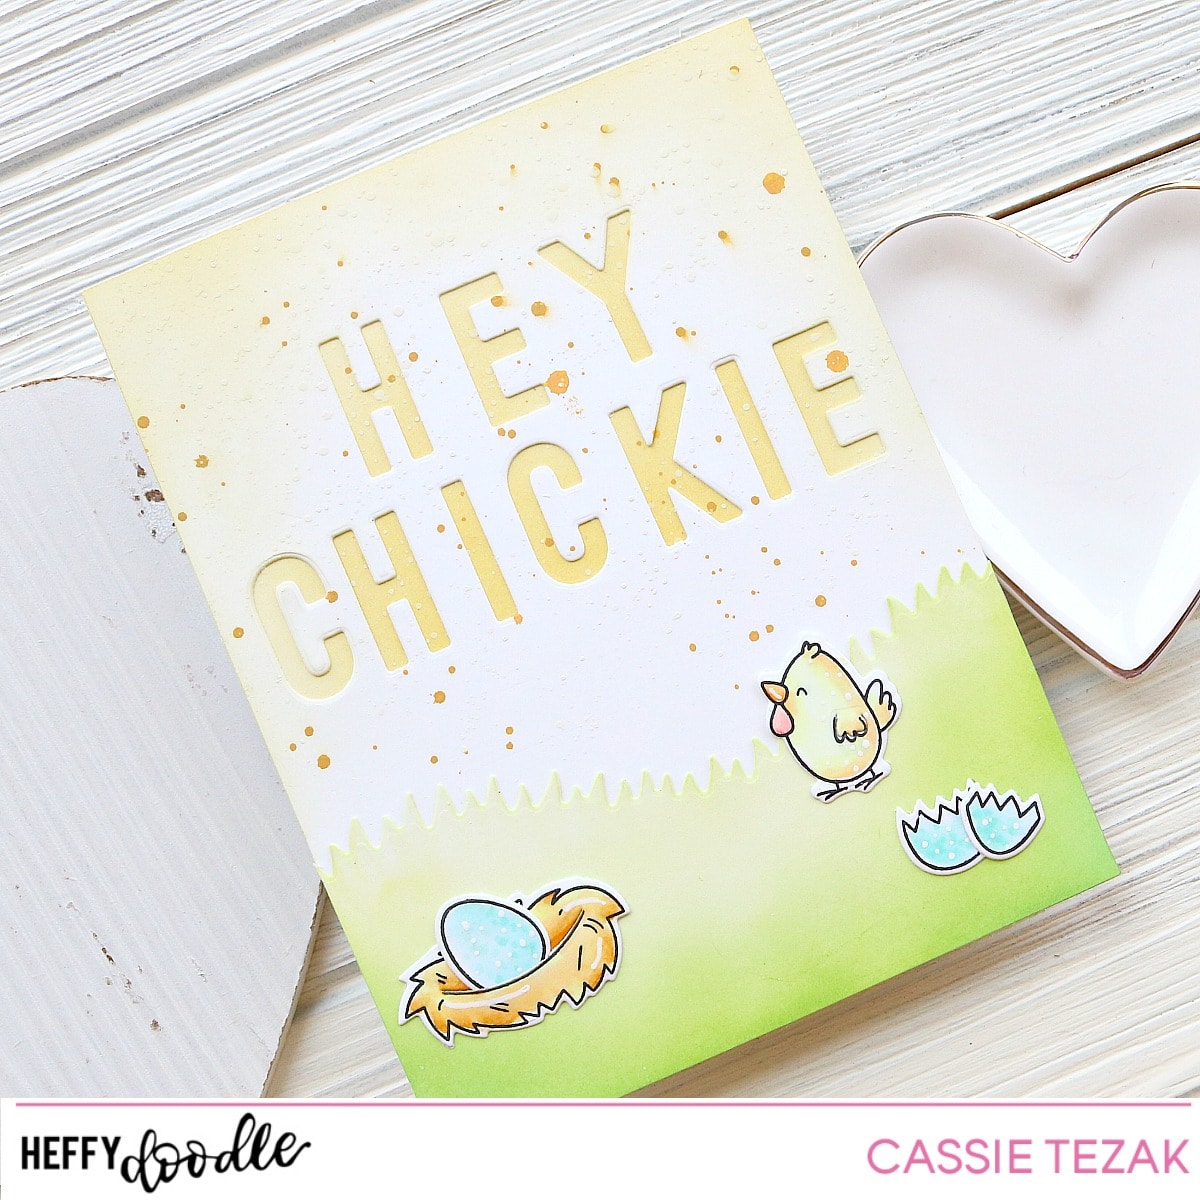
Hi everyone! It’s been a while, hasn’t it?! I’m excited to be back sharing cards with you for Butterfly Reflections Ink for the next few months 🙂 Vanessa asked me if I could fill in, and of course I was thrilled to do so and dip my toes back in the card making universe after being absent for so long. Today I have a card to share with you using some of the awesome products found in her shop. Let’s take a look at the card.

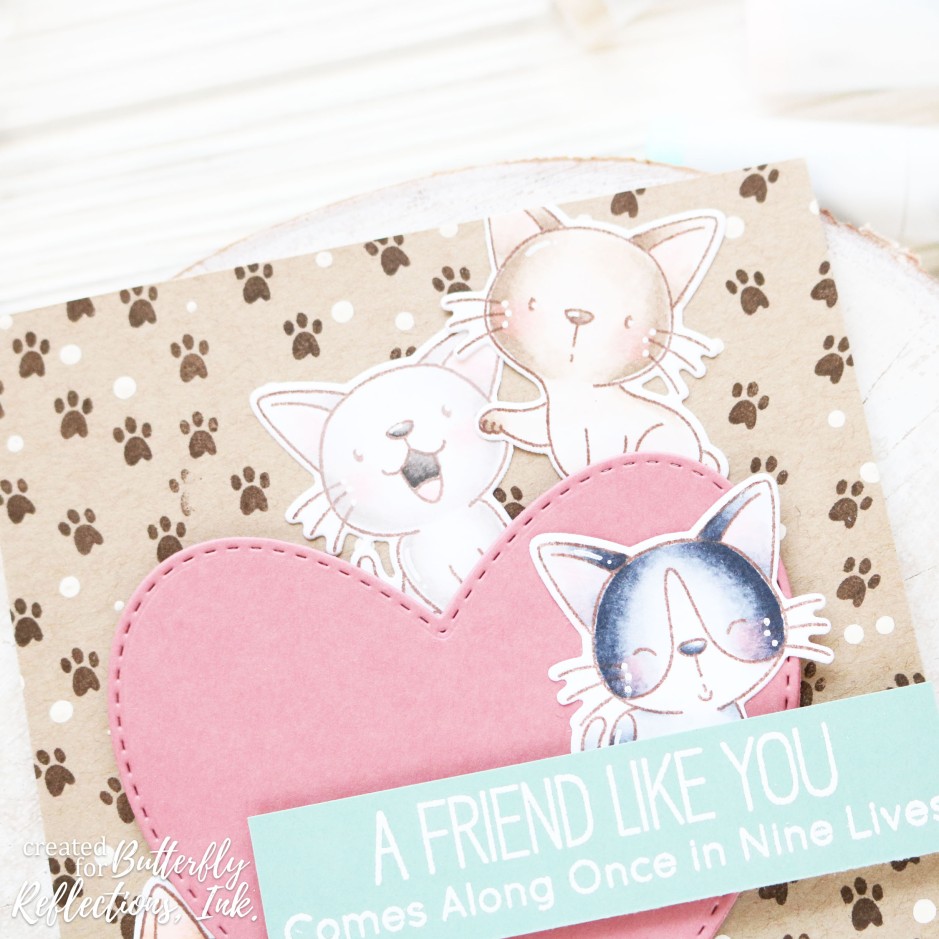
I love the animal stamps that MFT has, and I couldn’t resist using these cats from the Cat-astrophe stamp set. I stamped out four of the cat images from the set using one of my fave brown inks from Catherine Pooler: Icing on the Cake. Then I used my copic markers to color them all in. Every now and then I love the softer lines of the brown ink instead of going with my standard black ink. Once they were colored I used the coordinating dies to cut them out.

Next I used some colored cardstock and kraft cardstock from Lawn Fawn to create the background and other stamped and die cut pieces. For the background I stamped the paw prints with the same Icing on the Cake ink onto an A2 sized piece of kraft cardstock. I also added some white dots with paint and a dotting tool. I die cut a heart using the Stitched Heart die by Heffy Doodle and some Pencil Eraser cardstock from Lawn Fawn. This is one of my favorite pink cardstocks of all time. And I love the weight of the Lawn Fawn cardstock! Finally I stamped a piece of Sage Leaf cardstock with a sentiment from the Cat-astrophe stamp set with VersaMark ink and heat embossed it with white embossing powder.

All that was left to do was put the card front together! I added foam tape to the back of the heart and tucked the cats around it, adding the sentiment last. Final touches included some white gel pen dots and accents on the cats and my card was finished! I had so much fun making this card and getting back into one of my favorite hobbies. I was definitely rusty, but I can’t wait to keep creating and sharing my cards with you all! Thank you so much for stopping by, and I’ll see you again soon with another card!

Spellbinders Club Kit Sale

Hi everyone! Today I’m sharing a card I made using one of the die sets from a past Spellbinders Club Kit. You can save up to 40% on past club kits! What a great deal, right?! I was able to create a cute dimensional card using the For You  Gift Card Holder from the large die of the month kit. Here’s what I came up with!

IMG_3899

I love this adorable gift bag in this set, but I wanted to use it on a card instead of on its own. I die cut the bag, tissue and handle and put them together on the card after stamping and die cutting the sentiment. I used lots of splatter and ink on this card. It was so fun to do mostly die cutting and ink on a card for a change!

IMG_3903

I love the little tassel die that is in the set. You could create some adorable garland with it! I used a die cut of the bag handle to create a streamer across the top of the card. This is such a great deal, and there are a lot more die sets available over at the Spellbinders shop!

Here are the full details from Spellbinders regarding the sale:

Social-1200x1200

Full promo details:

Save up to 40% off select past club kits http://www.spellbinderspaperarts.com. Club members must Log In to view club member discounts. Orders are processed in the order that they are received. If you purchase an item that is out of stock, the item(s) will be removed from your order and you will not be charged for that item(s). Offer is for individual consumer use only; not for distribution; excludes clearance items, tax, & shipping. Not valid on any previous web, phone or retail purchases; cannot be redeemed for cash; cannot be combined with any other offer; void where prohibited; limited to stock on hand. Offer only available 10-15-19 to 10-20-19 at 11:59 PST.

Thanks so much for stopping by today! I hope you enjoyed the card and I’ll see you again soon with another one!

Heffy Doodle New Release Hop!

HeffyFriendsHopJuly19.jpg

Hi, everyone! Welcome back to the blog! Today I’m sharing a card for the Heffy Doodle new release blog hop. The release is available now, and you’re going to want to get your hands on everything! There is so much cuteness in this release. You’re going to love it 🙂 Let’s jump right in to it!

IMG_3773

How sweet is all this?? I used the adorable new Absotoothly Awesome stamp set and the umbrella from Quack Me Up for my main images. I also used the Sunshine die and new Rascal Alphabet stamps and dies to create my own sentiment.

IMG_3775I also used the Rain on My Parade stencil with the Silver Linings cloud dies to create the background. I just love how this all paired together!

IMG_3781

And that’s my card for the hop! I hope you enjoyed it. Be sure to keep hopping and leave comments on the posts to enter yourself for a chance to win a certificate to the Heffy Doodle shop!

Here’s the line up – make sure you didn’t miss anyone!

Heffy Doodle

Ali Farmer

Isha Gupta

Cassie Tezak

Tallie Clewley

Kelly Martin

Jessica McAfee

Lesley Oman

Your Next Stamp Challenge

Hi everyone! I’m popping in today to share a card I made for the new Your Next Stamp challenge. The new theme is “ombre” and I couldn’t wait to get crafty with this in mind 🙂

IMG_3698

I used the new Butterfly Panel die over a piece of card stock that I had ink blended Seedless Preserves Distress Oxide over to create my ombre. I heat embossed a sentiment and used foam tape to adhere it. And my card was complete! I hope you enjoyed my creation for today. Be sure to stop over to the Your Next Stamp blog and join us for the new challenge!

Heffy Doodle & Chibitronics Collab!

Hi, everyone. I’m super excited to share a card I made for today’s post with you. It features products from both Heffy Doodle and Chibitronics! We were super lucky to be able to team up with the Chibitronics team and make some awesome cards for this hop. You can win a Chibitronics Starter kit and a £50 Heffy Doodle gift certificate! Two winners will be chosen May 6th 🙂 Here’s the fun card I came up with.

IMG_3573

I started the card by planning out my circuit. This meant I drew a rough sketch of my card and then started creating the card. I used my Distress Oxide Sprays to create the background. This was fun, and super easy. I just sprayed Worn Lipstick, Spiced Marmalade and Fossilized Amber over an A2 card base and that was it! I let the sprays do there thing, and completely dry before I came back to die cut the hearts from it.  Once the hearts were die cut I took a piece of vellum and my Misti and stamped the hearts from Eggcellent News and heat embossed them with white embossing powder. Beneath the hearts is where I put my Chibitronics red light bulbs from the starter kit. The starter kit has everything you need to make your first light up design!

IMG_3577

I made sure to get my copper tape circuit right where I needed it to be to get the lights to work, and did a lot of testing before I moved on to make sure I wasn’t going to run into any problems after the card was put together. Then I added foam tape around the battery and card base so as to give the battery room so that the lights weren’t on all the time.

I used the Grassy Lass border dies and Stitched Slopey Joes border dies to create some dimension below the volcano that I stamped from the Geology Rocks stamp set. I also stamped out all of the dinosaurs from the Dino Time stamp set. These cuties just go so well with the volcano-I couldn’t pass up using them to finish my scene!

IMG_3578

I also couldn’t resist adding a speech bubble from the Whatcha Sayin stamp set for the T-Rex. Too cute! I finished the card by heat embossing the sentiment “I Lava You” and adhering it to the bottom of the card.

IMG_3579

All right! That’s it for my card, but be sure to hop along to the rest of the projects and leave some comments for your chance to win! Thanks so much for stopping by today! I hope you enjoyed my project and get inspired to make some cool light up cards 🙂 I’ll see you again soon with another card!

Heffy Doodle

Koren Wiskman

Kelly Griglione

Jessica McAfee

Wei Wei Wang

Francesca Vignoli

Yukiko Sugiyama

Isha Gupta

Eiko Uchida

Ali Farmer

Kelly Szafron

Cassie Tezak

Vanessa Reinheimer

Yukiko Inami


Your Next Stamp April Release!

April2019HopBadge

Welcome back! The Your Next Stamp April release is here, and it’s so sweet. We are kicking it off with a blog hop. I had so much fun making the card for today. Let’s get right to it.

IMG_3374

I made this card by die cutting the Cool Tags Five dies and creating a spot for the cute little fairy and dragonflies from the Wishing Well Fairy stamp set. I colored in some of the images from the set and arranged them around the tags. I also stamped one of the sentiments from the set on the smaller tags and popped it up with foam tape. I used more of those awesome sparkly gumdrops from the new release! I love that the purple ones actually look like gumdrops! This release is so cute and you’re going to want to see it all. Be sure to keep hopping along by clicking the blue button below. Leave a comment to enter yourself to win a gift certificate to the YNS shop!


Also, don’t forget to use the coupon for your orders placed through April 8th! Thanks so much for stopping by today. Have fun hopping along!

April2019SaleBadge.jpg


You Are Souper

Hi, everyone! Happy Monday. This week is going to be a busy week for me, so I decided to make an encouragement card for today’s Penguin Palace post. Anyone else needing a little encouragement to get through Monday? Let’s jump in!

IMG_3358

I started the card for today by die cutting two of the Cross Stitched and Dots Large and Small die sets. The larger one I die cut from some light gray card stock and the smaller from some white card stock. I love the detail that these dies add to a card. It’s so sweet.

IMG_3360

Next I did some creative masking to stamp out the “you are” sentiment from the Get Well Soon stamp set. I love searching other stamp sets to create my own sentiments. To finish the sentiment I die cut some of the Heffy Doodle alphabet dies to spell out “souper” from white card stock. I colored the letters in with my Copic markers for a fun pop of color.

IMG_3361

Finally, I stamped out the chef from the It’s Your Day and colored him in with my Copics. I used the coordinating dies to cut him out and popped him onto the card with foam tape. And that finished my card for today! I hope you enjoyed this creation, and that it brightened up your Monday a little 🙂 Thanks so much for stopping by today. I’ll see you again soon with another card!

Hey, Chickie

Hi, crafty friends! II’m back to share a cute spring card with you that I made for the HEffy Doodle blog today. Let’s get started!

I started the card for today by die cutting my sentiment “hello chickie” with the Stitched Alphabet Dies from an A2 size card panel. This took a little maneuvering, just because I only have one of each letter and there are doubles in the sentiment, but it wasn’t too difficult to get the spacing pretty close to even! Once that was die cut I ink blended the front of a card base with Fossilized Amber ink and adhered the panel with the die cut letters over top so that the yellow showed through.

I also ink blended some Fossilized Amber Distress Oxide ink over the corners of the front panel, as well as splattered from of the Distress Oxide spray over it in the same color. Next I moved on to the scene. I die cut a little hill of grass with the Grassy Lass dies from some 110 lb white card stock and ink blended Mowed Lawn and Twstited Citron over it to give it some color. Then I stamped out images from the  Eggcellent News stamp set. I colored those images in with my copics, adding some white gel pen details to each of them. Then I die cut them out with coordinating dies!

Finally, I adhered the die cut images to the card and it was complete! This card came together really quickly, and I think you could do a set of them in lots of springy pastel colors! It’d be so cute. Thank you so much for stopping by today! I’ll see you again soon with another card!

My Favorite Things Sketch Challenge

Good morning, everyone! Happy Wednesday. I’m back today to share my final My Favorite Things project as a guest designer for their challenge blog! I’m so sad the month is over, but it’s been so much fun getting creative with their sketches.

thumbnail (2)

This sketch was a fun one to end on, and I had the perfect idea for it. I was inspired by the freebie that comes with orders of $60 or more from MFT and the adorable new stamp set Purrfect Friends.

IMG_3323

I die cut the tree branch from white card stock and ink blended Stained Walnut Distress Oxide ink on it. I also splattered some of the Stained Walnut ink watered down over it. I also ink blended Broken China Distress Oxide Ink over an A2 size card panel. I splattered some watered down Faded Jeans Distress Oxide over the entire panel. I attached the branch to the card panel using some foam tape once they were both dry.

IMG_3325

Next I stamped out three of the birds from the Purrfect Friends and colored them in with my Copic markers. I used the coordinating dies to cut them out and attached them to the branch with foam tape and some glue. I could resist stamping one of the cats so that it looked as though he was watching the birds from the ground.

IMG_3326

Finally, I stamped out one of the sentiments from the new Anything But Basic Encouragement stamp set with VersaMark ink and heat embossed white embossing powder. Then I ink blended some pink ink over it and trimmed it down. It was also attached to the card with some foam tape. And that was it for my card! I hope you like the projects I’ve made for my month as a special guest designer for MFT stamps! I’ve had fun sharing them with you 🙂 Be sure to head over to their challenge blog and see more great inspiration! Thanks for stopping by and I’ll see you again with another card!

Happy Birthday!

Hello, everyone! Happy Monday. I’m back today to share a cute and simple birthday card I made by mixing some new and old Penguin Palace products. Let’s jump right in.

IMG_3328

I started by doing some ink blending with a stencil I made using the new It’s Your Day Bubble Call-Out die. Using the negative of the die cut I ink blended some Distress Oxide onto an A2 size card panel. I positioned it so that it hung over the top edge of the panel, and splatterd some water droplets over it for a textured look.

IMG_3329

Next I die cut one of the borders from the Fancy Hearts Scalloped Boarders die set to use as a frame on the card. I colored the frame with one of my Copic markers. That piece was adhered to the card panel with a liquid adhesive.

IMG_3330

Finally, I stamped and colored one of the adorable unicorns from Birthday Unicorn stamp set. Once it was colored I die cut it out with the coordinating dies and adhered it with some foam tape below the speech bubble. After adding some white gel pen details to the card it was complete! I hope you enjoyed this card I made for today. Be sure to check out all the newly released products from Penguin Palace! Thank you for stopping by today, and I’ll see you again soon with another card!